
Salesforce is a considerably vast and complicated platform. It is essential for a user to be thorough with all the nitty-gritty details of the platform for operating it the right way.
The CRM platform contains a variety of tools, features, applications, and add-ons for serving different purposes. Out of these, the most basic elements of Salesforce are Salesforce objects.
Salesforce objects are tabs of information where you can store specific details pertaining to your business. These objects are made up of fields and records, making the information stored more specific.
Salesforce objects help users in carrying out a variety of tasks by creating a relationship between them. They form the base for several business processes carried out within a Salesforce org. They also help you in carrying out various Salesforce integrations for improved user experience.
For example, integrating Salesforce with Zapier would require Salesforce objects to be used for creating integrated applications. Integrating Salesforce with Tableau would require using Salesforce objects for creating a variety of data visualizations.
There are two major types of Salesforce objects available for the users – standard objects and custom objects. Standard objects are the ones that are already created by Salesforce and are readily available to the users after implementation.
Let us understand the meaning and creation of a custom object in Salesforce.
What is a Custom Object?
A custom object in Salesforce is an object that can be created by users based on their specific requirements. These objects are generally created when the standard objects are not sufficient for carrying out required processes.
A custom object is the heart of any application, whether it is native or integrated. On creating a custom object and a related list for the same, users can customize their database and the functioning of the same.
It is safe to say that these objects are the lowest common denominators for any activity carried out using the CRM platform. Also, you can create an extensive custom object report using these Salesforce objects.
Ways to use Custom Objects
There are multiple features and benefits of a Salesforce custom object. Here are some of the major ways in which custom objects can be utilized for performing specific processes:
- Importing custom object records
- Tracking tasks and events for custom object records
- Creating a custom tab for the object to display the object’s data
- Building page layouts for controlling the fields that users can view and edit while entering data for the concerned custom object record
Now that you have the basic idea of what a custom object is and how useful it is for CRM activities, let us understand how it is created in Salesforce Lightning.
How to Create Custom Objects
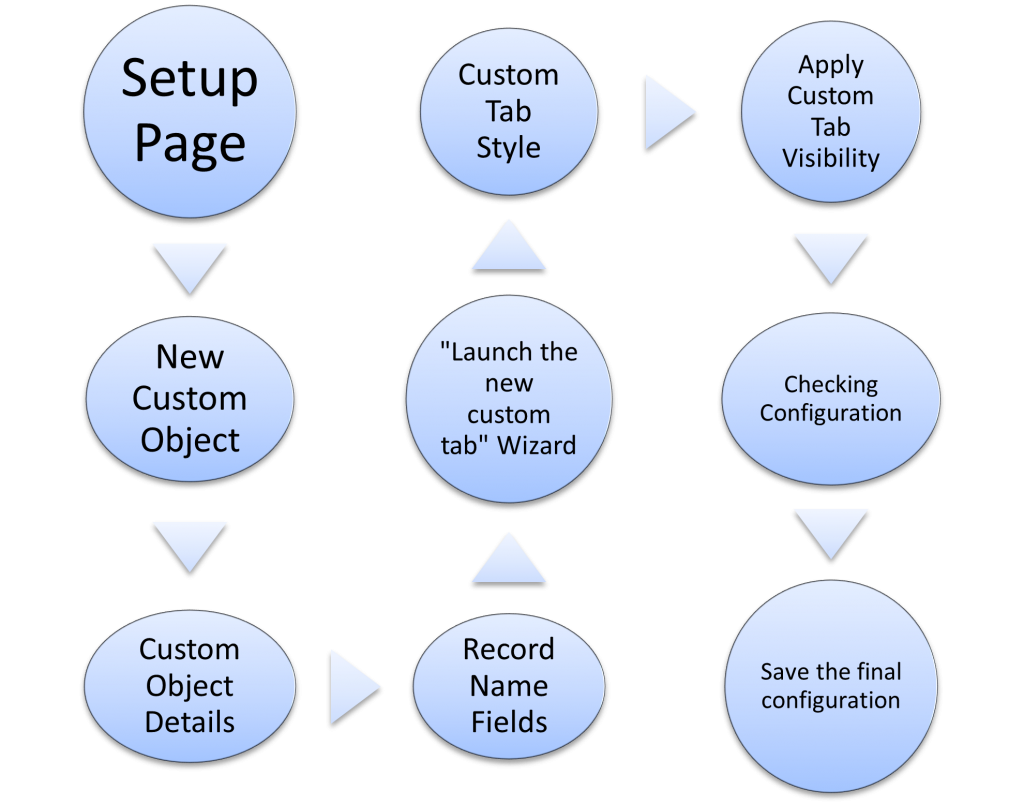
Creating a custom object on Salesforce Lightning is a fairly simple and straightforward process. Here are all the major steps involved:
Step 1
Start by logging into your Salesforce Lightning account.
Step 2
Go to the Setup page of Salesforce Lightning.
Step 3
On the Salesforce Lightning Setup page, look for and click on the option of “Object Manager”. From the dropdown list, click on the option of “New Object” followed by clicking on “New Custom Object”.
Step 4
You will now be directed to the New Custom Object page. Here, you need to fill in specific details about the custom object you want to create. You can fill in details about the Object Label, Object Name, Plural Name, and description of the concerned custom object.
Step 5
As you fill in the required details, you would see the record name fields get automatically populated. You can change these fields if you wish, or leave them as they are by clicking on the checkbox of “Allow Report” available in the section of Optional Features.
Step 6
Now, click on the checkbox of “Allow Search” in the section Search Status section, followed by clicking on the “Launch The New Custom Tab” wizard after you have saved your custom object. Always ensure that all fields are filled. Once you are certain, click on “Save” to proceed.
Step 7
Once you have saved the changes, you will automatically be directed to the Custom Tab Style page. Here, you can select your custom tab style by clicking on the tab style search box.
As you click on the tab style search box, you will be provided with several tab styles in a new window. You can have a look at all the options and choose the one that works best for you.
Step 8
As you click on the custom tab style you want to choose from the palette, move on the next Setup page by clicking on “Next”. You will now be directed to the “Add to Profile” page.
Step 9
As you land on the “Add to Profile” page, click on the option reading “Apply one-tab visibility to all profiles”. If you wish the tab to be visible differently for each profile, click on “Apply a different tab visibility for each profile”. Once you are done, click on “Next” to go to the “Add to Custom App” page.
Step 10
On this page, you will see the custom object configuration on your screen. Unless you want to make highly technical changes to the custom object you want to create, there is no need to make any change here. All you need to do is scan through the configuration and click on “Save” to continue.
Step 11
Once you save the configuration, your custom object is created within your Salesforce Lightning platform. You will now see a page with all the details pertaining to the custom object you just created.
You can go through the following steps if you want to verify and test the custom object created by you.
Step 12
For verifying the newly created custom object, you can click on the App Launcher icon on the Setup page of Salesforce Lightning.
Step 13
On opening the App Launcher, you will see the list of custom objects created within your Salesforce instance. Look for the name of the object you recently created.
Step 14
Finally, click on the name of your new custom object to verify and test the same.
You have now successfully created and tested a custom object on Salesforce Lightning.
It is important for a Salesforce user to be precise and careful while creating a custom object. For any assistance regarding the same, you can visit the official website of Cloud Advisory and get all the help you need.
Inline Editing
Once you have created a custom object, it is ready to be used according to your specific requirements. This object will contain multiple lists and records holding specific information pertaining to your object.
There may be situations when you want to edit the records of your custom object for making changes in your processes.
Inline editing is the process of making these edits within a record without having to press the “Edit” button. It also allows you to mass edit records from specific list views.
For enabling inline editing, you need to go to Salesforce Lightning Setup and navigate to User Interface by searching for it in the search box. From the section of User Interface, you need to click the checkbox of “Enable Inline Editing” and “Enable Enhanced Lists”.
However, not all fields and field-types on your records can be edited online. Here are some of the fields you cannot edit inline:
- Record ID, Create Date, and other built-in fields
- Custom date or time fields
- Standard fields like date/time, roll-up summary, auto number, long text area, master-detail, rich text, hierarchy, or checkbox
- Compound fields involving name, account name, address, and geolocation fields
- Encrypted text fields
Also consider …
Here are some of the major factors you need to consider for the purpose of inline editing:
- Make sure that the user has edit permission to the concerned object and the records therein.
- Make sure that the field record type is included in the filters on the list view after the editing permissions are set. However, always remember that this only works with a single record type. You can avoid this step if your object has no record type.
- Make sure that the fields that you are trying to mass update/edit are present on the page layout of the record type being filtered by.
- Always ensure that the field that you are willing to edit is included in the visible fields in the list view.
- Remember that you are not allowed to use Filter Logic to enable inline editing in the list view.
- You will not be able to go ahead with the inline editing of a field if it is a part of a look-up filter criteria.
- You are not allowed to inline edit either Controlling or Dependent Picklist fields on list views.
Salesforce custom objects play an important role in leveraging the overall functionality of the platform and customizing business processes according to your requirements.
If you are well-versed with the creation and working of Salesforce objects, you can perform the most complicated tasks on the CRM platform without facing major complications.